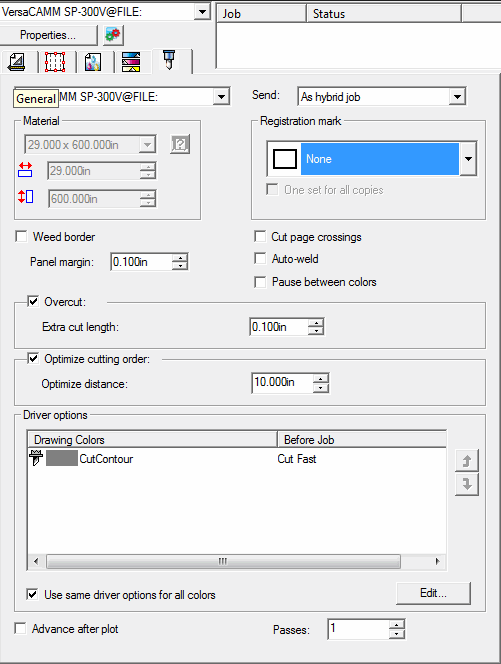
RIP and Print Dialog Box - Contour Tab
The Contour tab allows you to print and then cut a contour line around your design.
The output of a design with contour cut involves several steps as follow:
- Create your design in your software and add one or more contour cut lines. (See Using Contour Cut for more information.)
- From the File menu, select RIP and Print.
- Select the Contour tab in the RIP and Print dialog box.
- Set the contour cut options.
- Print your design.
- Cut the contour.